


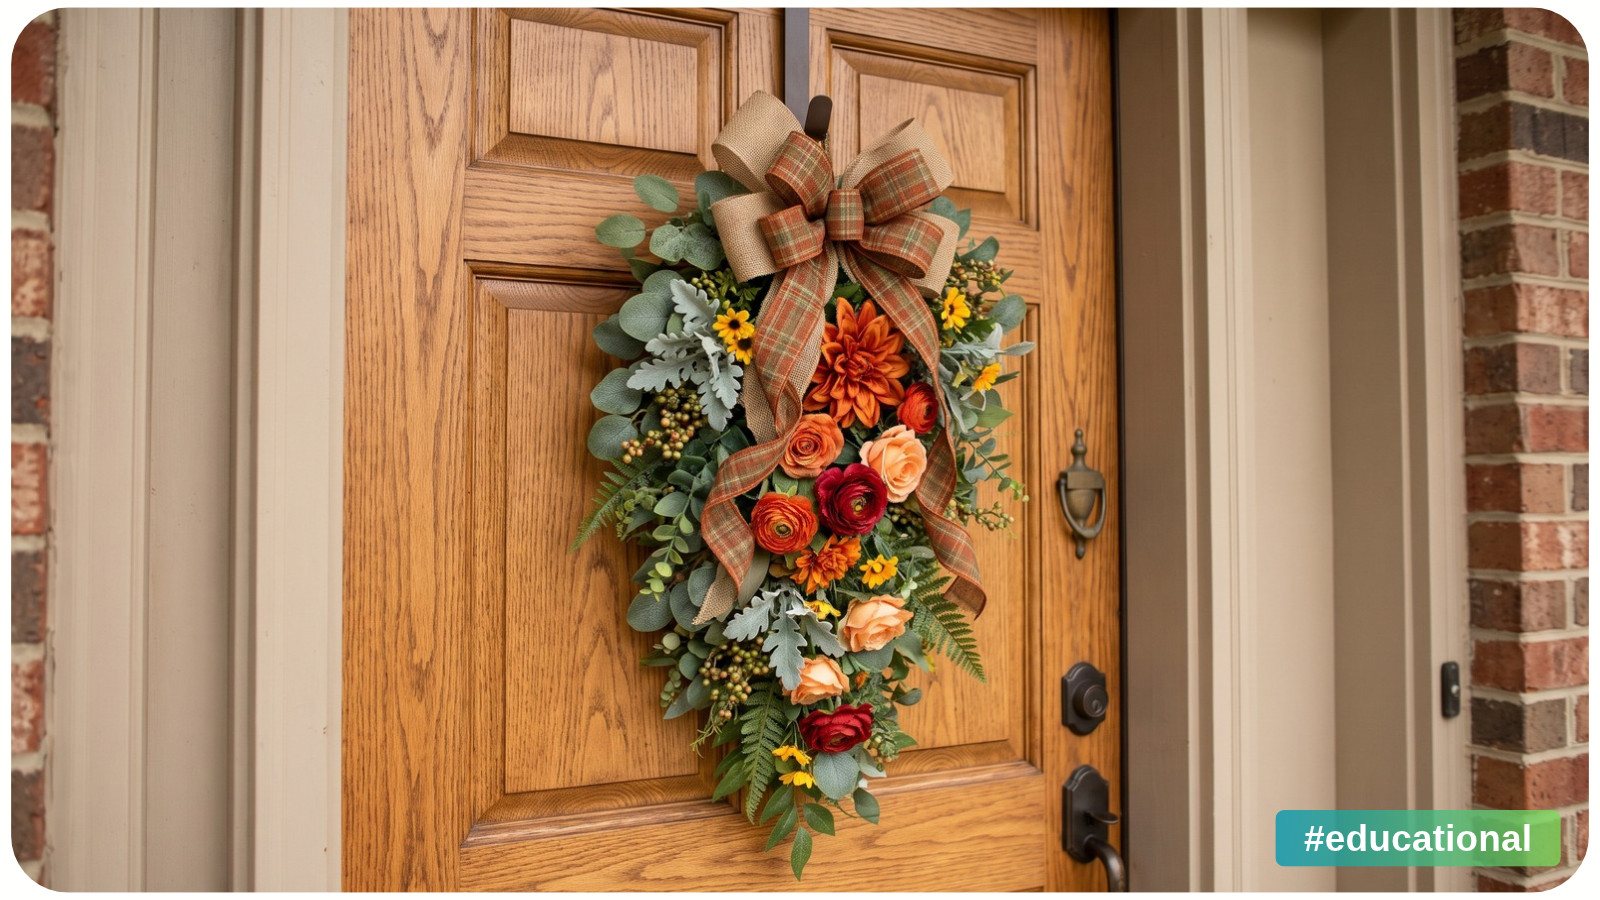
To make a seasonal door hanging without a traditional wreath, arrange a small bundle of faux greenery and flowers, secure the stems with floral wire, add a hanging loop, and finish with ribbon. This simple door swag gives you a slim, flowing shape without a wreath ring. Change the flowers and ribbon when the season changes.
The project below creates an upside-down bouquet: the cut stems sit at the top, hidden by a bow, while the leaves and flowers fan downward. It suits beginners and needs no sewing or glue.
Allow roughly 30 to 45 minutes for arranging and assembly as a planning estimate, plus any waiting time required by your door hook. Use it indoors or on a sheltered door, choosing materials labeled for the conditions where you plan to display it.
Materials for a Simple Seasonal Door Swag
For one small hanging, gather:
• Three lightweight faux greenery stems with several leafy branches each.
• Two lightweight faux flower stems or seasonal picks.
• A small spool of 22-gauge floral paddle wire.
• Narrow, sturdy woven ribbon for the hanging loop.
• Decorative ribbon for a bow and tails.
• Wire cutters suitable for the stems and floral wire.
• Scissors for ribbon, pliers for tucking wire ends, and a measuring tape.
• A door hook or hanger suitable for your door, display location, and finished decoration's weight.
These stem counts are a starting recipe. A full spray may replace several sparse stems. Choose fewer pieces if the bundle becomes thick or heavy. Reuse suitable stems and ribbon you already own; save smaller scraps for mini projects using leftover craft supplies.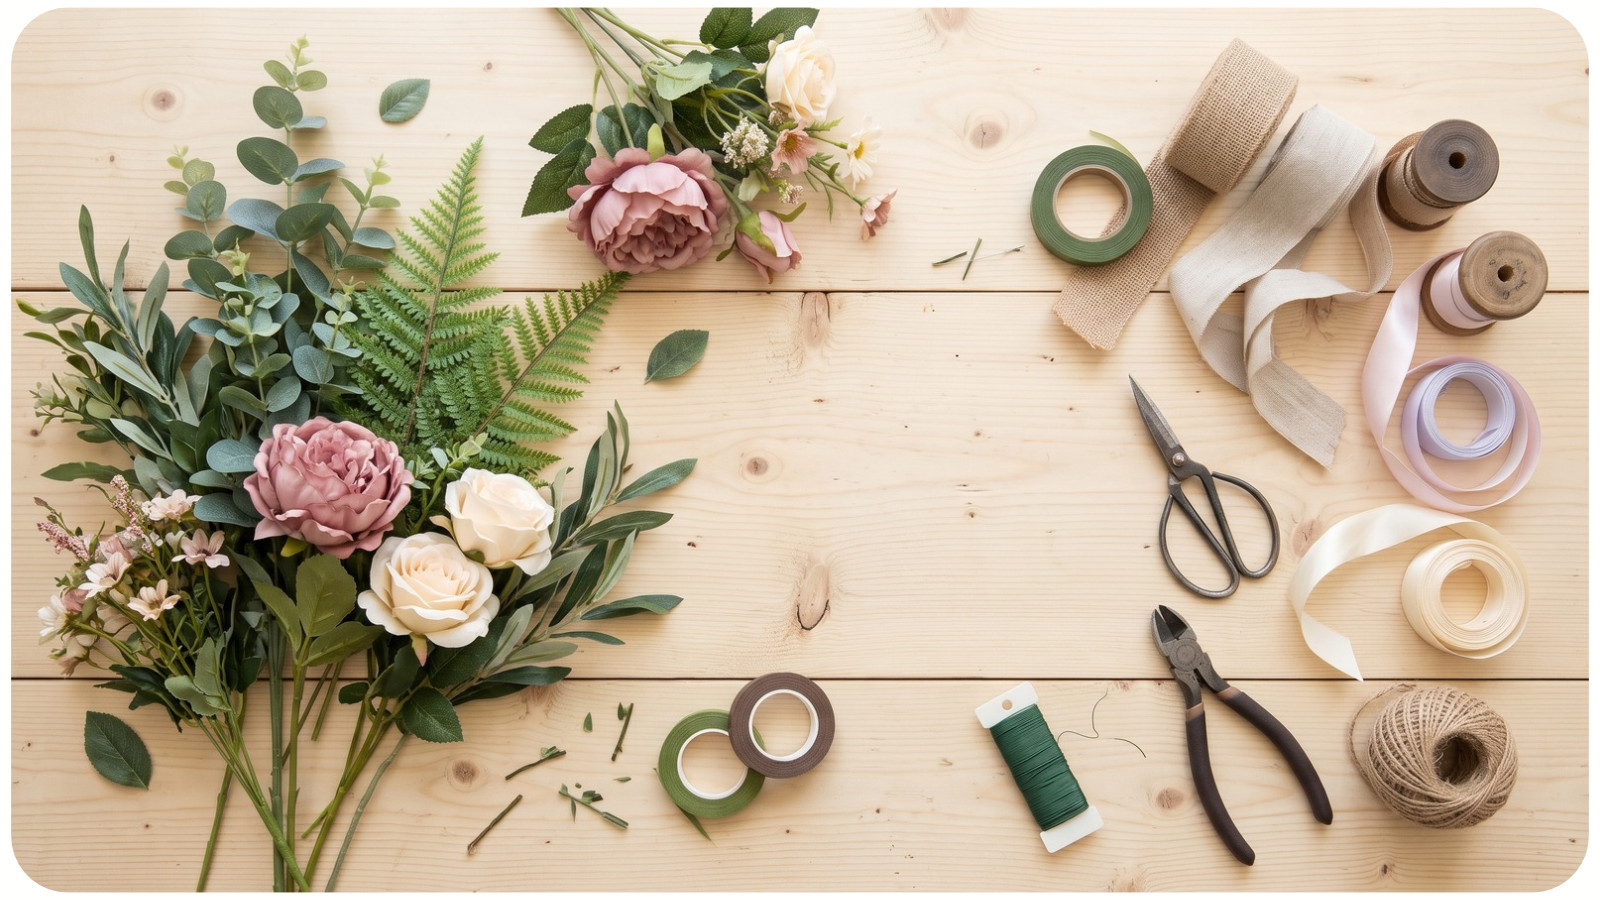
Have optional accents ready before assembly. A small faux berry pick or another flower is easy to include. Keep heavy ornaments out of this beginner version.
Use wire cutters for metal stems, keeping your fingers away from the cutting point. Ordinary craft scissors are for the ribbon. Gather the wire offcuts as you work.
Choose the Shape and Check Your Door
For a first version, plan a narrow teardrop with one longer piece of greenery down the center and shorter branches at the sides. Let the door's clear space guide the size.
Measure the area between any window trim, knocker, peephole, and handle. If you have a storm door, measure the gap with both doors closed. A flat arrangement can still be too deep once the bow is added.
Hold the unbound stems against the door before cutting. The arrangement should leave the handle and lock easy to reach and the peephole clear. Shorten your design if leaves catch the frame or moving hardware.
For the color scheme, choose one main flower color, one ribbon color, and greenery. This gives the small arrangement a clear focal point without needing extra decorations. If you need help narrowing your choices, try a seasonal mood board before buying supplies.
Make Your Seasonal Door Hanging Step by Step
1. Lay Out the Greenery Face Up
Cover your work surface and place the longest greenery stem face up, with its leafy tip pointing toward you. The bare stem end should point away from you. Add the other greenery on either side, also face up.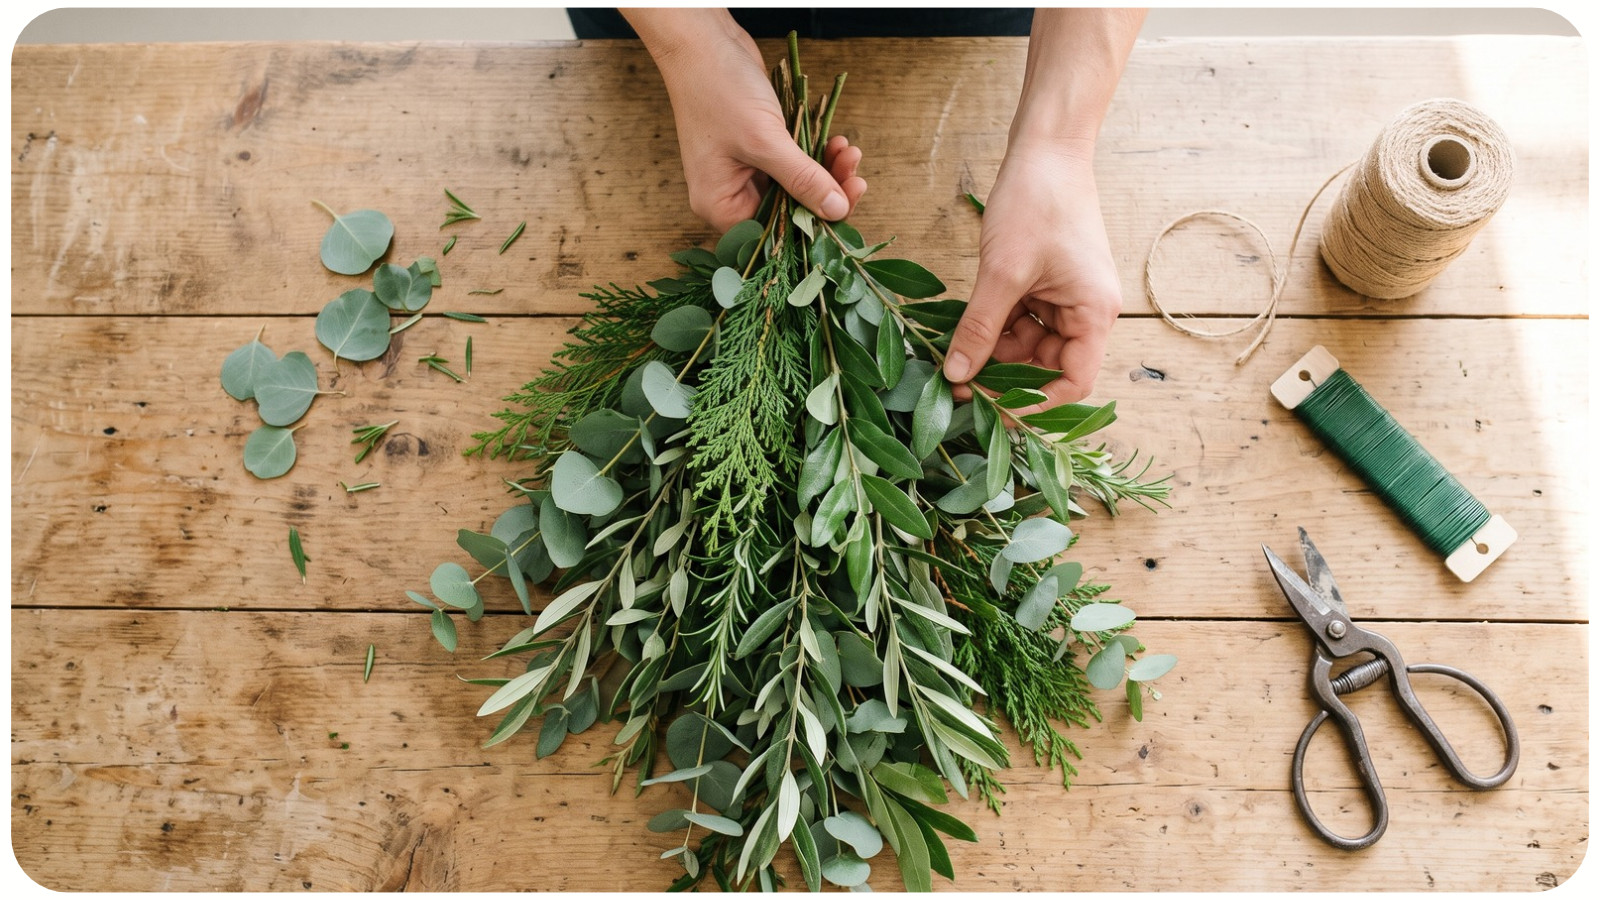
Overlap the bare stems near the top to create one narrow binding area. Fan the lower branches gently outward, leaving the center piece longest.
Check: The outline should taper toward the bottom. If it resembles a wide fan, move the side stems closer to the center before binding.
2. Position the Flowers and Trim the Stems
Place the flowers over the greenery, with one slightly higher than the other. Keep their stem ends aligned with the greenery stems at the binding area.
Lift the bundle into its hanging position, with the bare stem ends at the top. Check that the flower faces remain visible and the greenery does not hide them. Adjust the stems before cutting off any excess.
Check the bow size against the bundle, then trim only the bare stem length that would remain visible above it. Keep enough overlapping stem length for several snug wire wraps. If the binding area feels crowded, remove a stem rather than forcing the bundle tighter.
3. Bind the Bundle With Floral Wire
Hold the stems together at the binding area. Lay the middle of your hanging ribbon across the back of the bundle, at a right angle to the stems. Leave its two ends free on either side.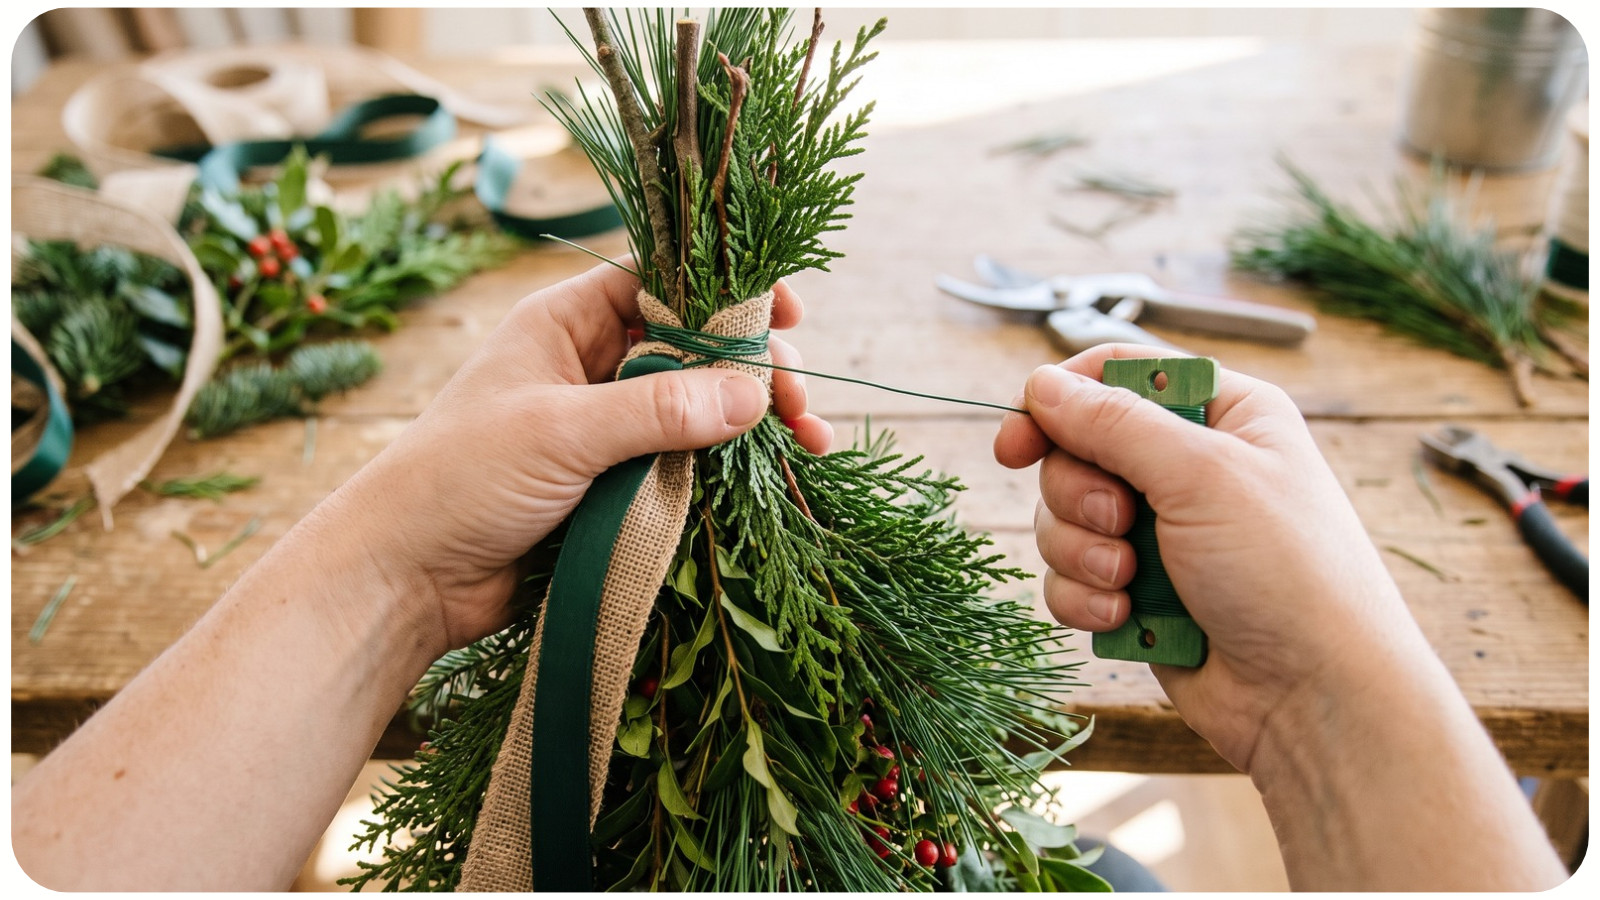
Leaving a short wire tail at the back, wrap the paddle wire around the whole bundle and the ribbon midpoint several times. The ribbon should be trapped beneath the wraps. Keep the wire close together and snug enough to prevent the stems from turning, without cutting into the ribbon or crushing the stems.
Cut the wire, leaving another tail. Twist the two tails together, then use pliers to fold the sharp ends inward toward the stems, away from the door.
Check: Support the bundle and gently tug each stem in turn. Nothing should slide out. If a stem shifts, unwrap and rebuild a smaller, tighter bundle before adding more decoration.
4. Attach the Hanging Loop to the Binding
Bring the two free ends of the trapped ribbon upward at the back. Tie them together in a firm double knot to form a short hanging loop. Leave tails beyond the knot so it cannot easily pull through.
If you forgot the ribbon, loosen the binding and insert it before tightening again. Do not force ribbon beneath tightly wound wire.
The loop must connect to the wire binding. Tying it loosely around the smooth stem ends can allow it to slip off.
Lift the arrangement by the loop over your work surface, keeping your other hand just underneath. Check that the knot holds, the binding stays tight, and the bouquet hangs with its flowers facing forward. If it tilts, lower it and move the loop toward the center of the bundle's weight.
5. Cover the Binding With a Bow
Tie the decorative ribbon around the bound stems and make a simple bow at the front. Arrange the loops to cover the wire and cut stem ends.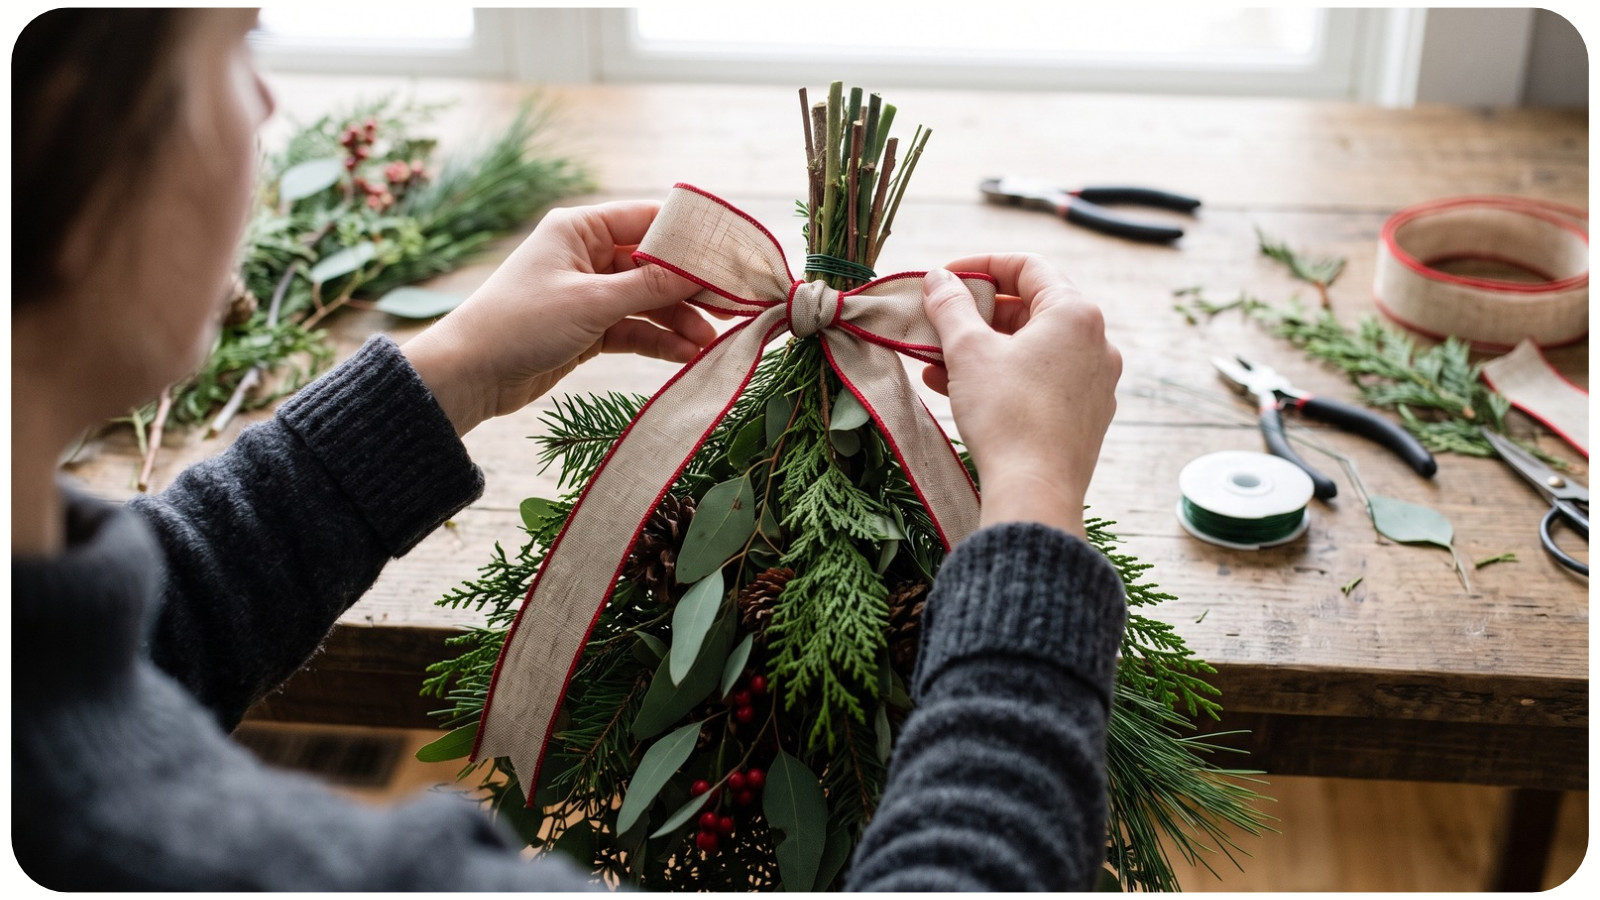
Let the ribbon tails follow the greenery downward. Trim them above the longest leaves so the foliage still defines the shape.
Inspect the back visually and use pliers to tuck in any exposed wire that could catch the door. If a hard or sharp stem still touches the surface, reposition it before hanging.
6. Hang It and Check Door Movement
Weigh the finished decoration and check the hanger's stated weight limit. For an adhesive hook, follow the exact product's surface, cleaning, temperature, application, and waiting instructions. Check that the door finish is compatible too; an adhesive hanger is not a guarantee against surface damage. An exterior door needs a hook approved for outdoor use.
An over-the-door hanger is another option if it fits your door's thickness and top clearance. Check that the door closes and latches normally without forcing it.
Hang the swag by its loop. Slowly open and close the door, then check any storm door. If flowers, ribbon, or branches catch, remove the hanging and shorten or flatten it before displaying it again.
Change the Look for Every Season
Keep the same construction method and swap the decorative stems and ribbon. Here are four simple combinations for seasonal front door decor:
Seasonal Greenery and Ribbon Combinations | ||
Season | Greenery and flowers | Ribbon idea |
|---|---|---|
Spring | Soft green leaves and small faux blossoms | Pale yellow or light pink |
Summer | Fern-style foliage and bright faux daisies | Blue or white |
Fall | Faux autumn leaves and a small berry pick | Rust or muted gold |
Winter | Faux evergreen sprigs and red berry picks | Deep red or green plaid |
These colors are suggestions, so adapt them to your door and the materials you have. For a softer autumn version, explore fall color palettes beyond orange and red.
Before changing the flowers, take the hanging down and undo the bow and wire binding. Rebuild it using fresh wire if the old piece has become kinked or damaged. Repeat the stem and hanging-loop checks after each change.
Keep Your Door Hanging Looking Good
Dust faux leaves gently with a soft, dry brush. Follow the stem and ribbon makers' care instructions before using water or cleaners. Artificial flowers are not automatically suitable for rain or direct sun, so check their labels before outdoor display. Outdoor suitability applies to the whole arrangement, including the ribbon and hanger, not just the greenery.
Bring the decoration inside during strong wind or severe weather. Check the loop, binding, and hanger regularly, especially after the door has been used often.
For storage, remove the hanging from the door and place it in a roomy box without crushing the bow or flower heads. Store it dry. Before its next outing, lift it by the loop over a table and check for loose stems, sharp wire, and worn ribbon. Once it hangs straight and the door moves freely, your seasonal decoration is ready to use again.